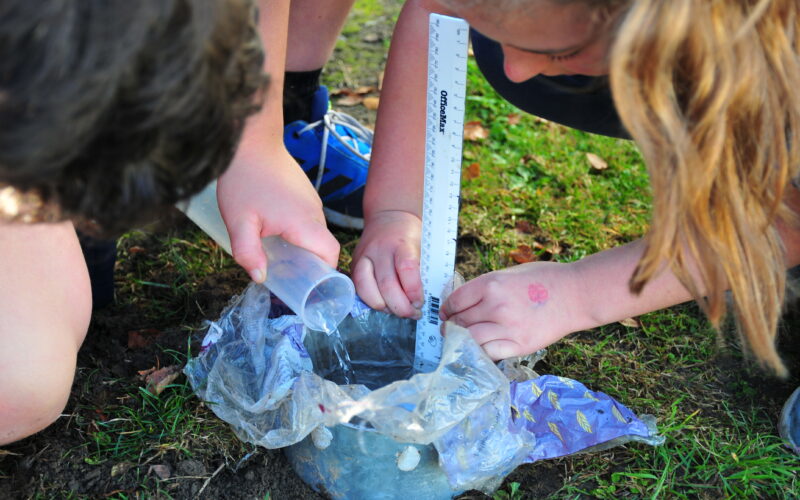
These days we seem to either get rain in huge dollops, or it doesn’t rain at all for weeks and the soil acquires a dry crust on top.
It’s therefore important to have some idea about whether, and how rapidly, it will sink into the soil on different parts of your farm. Some may well be sandy, and others have layers of heavy clay. The best soil should be like a bath sponge – a lot of holes with aggregates of soil around them. Compacted or clay soil is more like a brick: water can’t run through it at all. When soil is well aggregated and has good porosity it will also be biologically healthy, as only biology and its microbiome can aggregate soils.
A series of infiltration tests, conducted in different places, can give you a fairly reliable idea of where the next lot of rain is likely to end up – cosily round the roots, or washing through quickly, or just plain running off, and taking a lot of soil fragments with it.
An infiltration test requires some different equipment. First, a cylinder of steel or heavy plastic from 80cm to 120cm in width and about 150cm long. Sharpen one end on the outside so it can cut through the soil. If this sounds difficult, you can use a length of plastic downpipe, or even a baked bean tin. Mark the outside with a line 5cm from the sharpened end, and mark the inside with two marks near the top, 3cm apart.
There are two methods for adding the water. One, for the very particular, is a measured amount equivalent to 3cm in the cylinder. The second just fills the cylinder and then counts the time from the top mark to the next one.
To get the cylinder into the ground level you will need a length of timber laid across the top and a mallet or sledgehammer to drive it down; either a stopwatch or your phone to record the time; and a notebook for writing up the times at your various sites.
So, first clear the site of anything growing where the cylinder will sit. When you’ve got bare soil, make sure it is pressed against the inside of the in-ground cylinder to avoid unintended leakage.
Pour in the water (rainwater for best results). You will see in one of the videos they use a piece of Glad Wrap to line the exposed cylinder and hold the water until you start counting. This may be useful if the soil has been cultivated a lot. For pasture just carefully fill the cylinder to the top inside mark, making sure you don’t stir up the soil.
If you have used it, drag the Glad Wrap out carefully, switching on your timer at the same time. Then wait. When the water level is just shiny on the soil, stop the clock. If you didn’t, stop the clock when the water level reaches the lower mark.
This test should ideally be done when the soil is already wet, so after some rain but not soggy. Depending on the soil bulk density at each site (where it is, whether wheels have run over it, whether it is sandy or clayey) your infiltration can take anything from seconds, to minutes, to hours. Gabe Brown reported that when he began tests on his North Dakota ranch it took hours, and these days some areas take seconds. If you are caring for your soils, your results will probably get shorter each time you test.
Here are a couple of YouTube links that will give you confidence in how to measure infiltration in your soils.
Who am I? Sue Edmonds is a farming and science writer from Waikato.


